Doorway to Tears
Creating a stylized Scene
Introduction
Hello everyone! I’m Amanda Melville & I’m a 3D Environment Artist! I primarily focus on stylized art and I absolutely adore taking the time to have a scene be driven from a story narrative. I wanted to take the time and discuss a bit of my process throughout this project and talk about what I’ve learned!
I’ll be touching base on quite a bit, and this is just the knowledge I’ve gathered throughout my short time in the game dev world. So please be mindful that there is no correct way of doing one thing and everyone learns their own process/what works best for them!
I hope you all are able to utilize and go through the resources and information I have included down below. Thank you for your time coming along the journey with me and let’s get into it!
Content
Starting Project
Maya - Blocking in Phase
Zbrush - Highpoly
Maya - Revise Highpoly Models & UVs
Substance Painter - Texture Time
Unreal Engine 5 - Rendering / VFX
Final Thoughts
Starting the Project

Planning / Concepting
Whenever I get into a project, I find it really important for me to gather references / find or create my own concept. Since I wanted to do a piece inspired by Tears of the Kingdom, and it wasn’t something in game or a concept I had seen before, I decided to create my own concept. I gathered some art by Milena Vasyukova to use as reference, then found screenshots in the game of what I needed reference for. I also wanted to stay within a certain color palette, so I was sure to include those in my drawover / concept.
I first started my concept off with a basic block out of the idea I had in Maya. Once I had the overall idea created, I then took a screenshot and took it into Procreate to elaborate and plan out what the project would look like. While I’m creating the concept, I’m doing my best to be mindful of how I will move forward with creating it and making sure it was as an efficient of a process as I could make it.
Maya - Blocking in Phase

Block Out - Getting the shape language
This point in the project is still quite early on but can really make the difference of how the rest of the project will go.
At this phase I wanted to just be as mindful as possible to create everything with as minimal backtracking or unnecessary effort. I decided here that I would only focus on half of the model then mirror the rest of it. I figured that even though it may seem repetitive with the details, being a door, I figured that it wouldn’t change the overall quality of the finished model.
As there are somethings that completely change after this point, and others stay pretty consistent, just making iterations and stepping back from it for a moment to see how the overall feeling / shape is.
During this whole project there is quite a bit of going back and forth between programs. This is quite normal for most, if not all, of my projects. I know it may seem redundant at times to have to switch and flipflop between programs, but it can be quite helpful especially if you’re in a program you’re not as comfortable doing a specific task in (i.e. I never do my UVs in any other program besides Maya).
Zbrush - Highpoly

Sculpting the Details
Either the best or the worst part! Depending on how you may feel about the interface of Zbrush.
I personally love this part, I think there are many different methods that can be used to create hard surface details from the options of brushes.
I typically stick with these brushes:
DamStandard
Pinch
TrimDynamic
HPolish
Move
SnakeHook
OrbFlatten-Edge (orb brush pack)

I typically change these brush settings:
Something I will do as well is go into the drop-down menu for “Brush” and scroll down until I see the “Auto Masking” then open the setting. Then click on “BackFaceMask” option. This just makes sure that you’re not sculpting through the model onto the other side when you don’t want to.
I also make sure that I adjust the intensity setting of most of the brushes I use and change it throughout the highpoly phase. I don’t believe that most times I ever use the same setting for the intensity.
I wasn’t sure how to approach the horns coming out of the columns in Maya, so I decided that using ZSpheres would be the best option to get the look and feel of what I wanted. It can be a bit tricky to get comfortable with ZSpheres at first, but it’s a great way to get a nice shape language of horns, tree trunks, foliage, etc.

Most of this sculpt I worked on half of it then mirror and welded the mesh / made sure it was completely in ZBrush’s world orientation to be able to use the symmetry option with brushes.
Whenever I finished the sculpt for the day, I would do my best to make sure that it was always mirrored. I wanted to do this to make sure that it reads well on both sides and on the overall project. This may seem unnecessary but for me it made sure I was keeping to the concept / original idea.
Maya - Revise Highpoly Models & UVs


This could be one of my least favorite parts within the process. It’s just one of those things that needs to get done and typically isn’t immediately reflective of the work you put into it. This really shows more at the end of the project and while baking details in Subtance Painter from the high to the low models.
For me going back and revising models to be more optimal and lowpoly then focusing on UVs afterwards can be tenacious work that can be done many different ways. I primarily take my highpoly model from ZBrush then take it back into Maya to begin the process.
I will try and use any of the “midpoly models” that I can use and deleteing any unnecessary geometry. With whatever I can’t adjust geometry with then I will start going through the highpoly models and quad draw them in Maya.
Before exporting out of Maya, and before finishing the UVs, I plan on what I want to be apart of the same texture. I didn’t want everything to be on one material, so I decided to have majority of the scene and assets to be on M_Scene, while having the rocks being on their own material M_Rocks, then finally the floor being on its own material M_Floor.
Substance Painter - Texture Time
Painting and Texturing
Most artists favorite time during the project, creating the textures! This phase of the project can be extremely rewarding, as well as challenging, to feel the pieces all coming together.
It can be also tricky or difficult if you’re baking a high poly mesh to a low poly mesh. But as the years go by it seems that Substance Painter is just becoming more and more efficient and making this process more streamlined.
Checking values can really help with understanding how to push your textures in a way that encourages the viewer to look throughout the scene how you intend them to.
During the texturing process, as well as being in Unreal Engine, I checked my values. I typically grab a higher quality render of the model, take that render into Photoshop, then create a new layer and fill that with black (making sure the new filled layer is on top), then changing the blend mode of the filled layer to Hue. I find that this shows a more genuine view of your values in the scene vs using a black and white filter. A lot of the times with black and white filters they tend to change specific settings that don’t reflect the original image. Such as adding a vignette, changing the contrast, really could be a little bit or a lot of different adjustments that can be attributed certain black and white filters.


The most left image above is early on in the texturing phase in Substance Painter. The three images following that are from Unreal Engine renders. As you may tell in the Unreal Engine renders that the texturing is changing subtly. I decided to check my values more in engine just because I wanted to make sure I was setting up my lighting well, as well as being considerate of the effects I added in. As mentioned prior, I find myself going in between programs and different software constantly during a project.

The overall process I did for this project for texturing is (on each material):
Start off with setting up your Painter file to be whatever settings you need. I believe I focused on using the default settings or just changing it to Unreal settings.
Then configuring and setting up the bake from the high poly model.
Create just a fill layer with only color effecting the layer. I will go ahead and make the base colors for all of the models to see how it all feels before diving too deep into it all.
From there I have a mindset of if I were actually painting it in real-life. Thinking about how to “layer” the paint to convey a specific material.
After feeling confident about the base colors, I will slowly start adding more details. Typically going through and adding AO where I desire it. Focusing on the shadows, I’m thinking of a more contrasting color than the color palette I’m using. So, since the overall color scheme being warmer tones, I decided to have the AO and shadows being a cooler tone, being a very dark toned blue/purple.
Thinking of the opposite of AO, using highlights. This I will typically keep the same color palette as the rest of the textures, so I decided to use a very light yellow / orange. I usually will have a more dithered / less refined highlight for the bottom layer of highlights, then begin to build up with more crisp highlights.
I start going back and usually adding a separate layer / group for roughness and metalness or I will go to the main base color of the material and add the roughness and metalness from there.
Then just building up on each layer with color variations, normal details that I may of wanted to add in, anything to push the materials further into reading as that type of material.
You can visiually see this process more clearly with some of the WIP photos.


Unreal Engine 5 - Rendering / VFX
The best part! Seeing it all starting to fully come together. I typically will get my environment / scene in Unreal or whichever rendering engine I’m using, to be sooner rather than later. Typically, before I started texturing or when I get base textures from Painter, I will go ahead and start setting up the scene.
Specifically, with UE5, you can do so much within this program. I will do my best to focus on what tools/workflows/resources I used to assist myself with creating the end result.
I did use quite a bit of resources, videos, and documentation to be able to fully execute the scene how I wanted to. I will be sure to link any resources I have used or considered it would be useful! Keep an eye out for any specific links in this blog.
Materials -
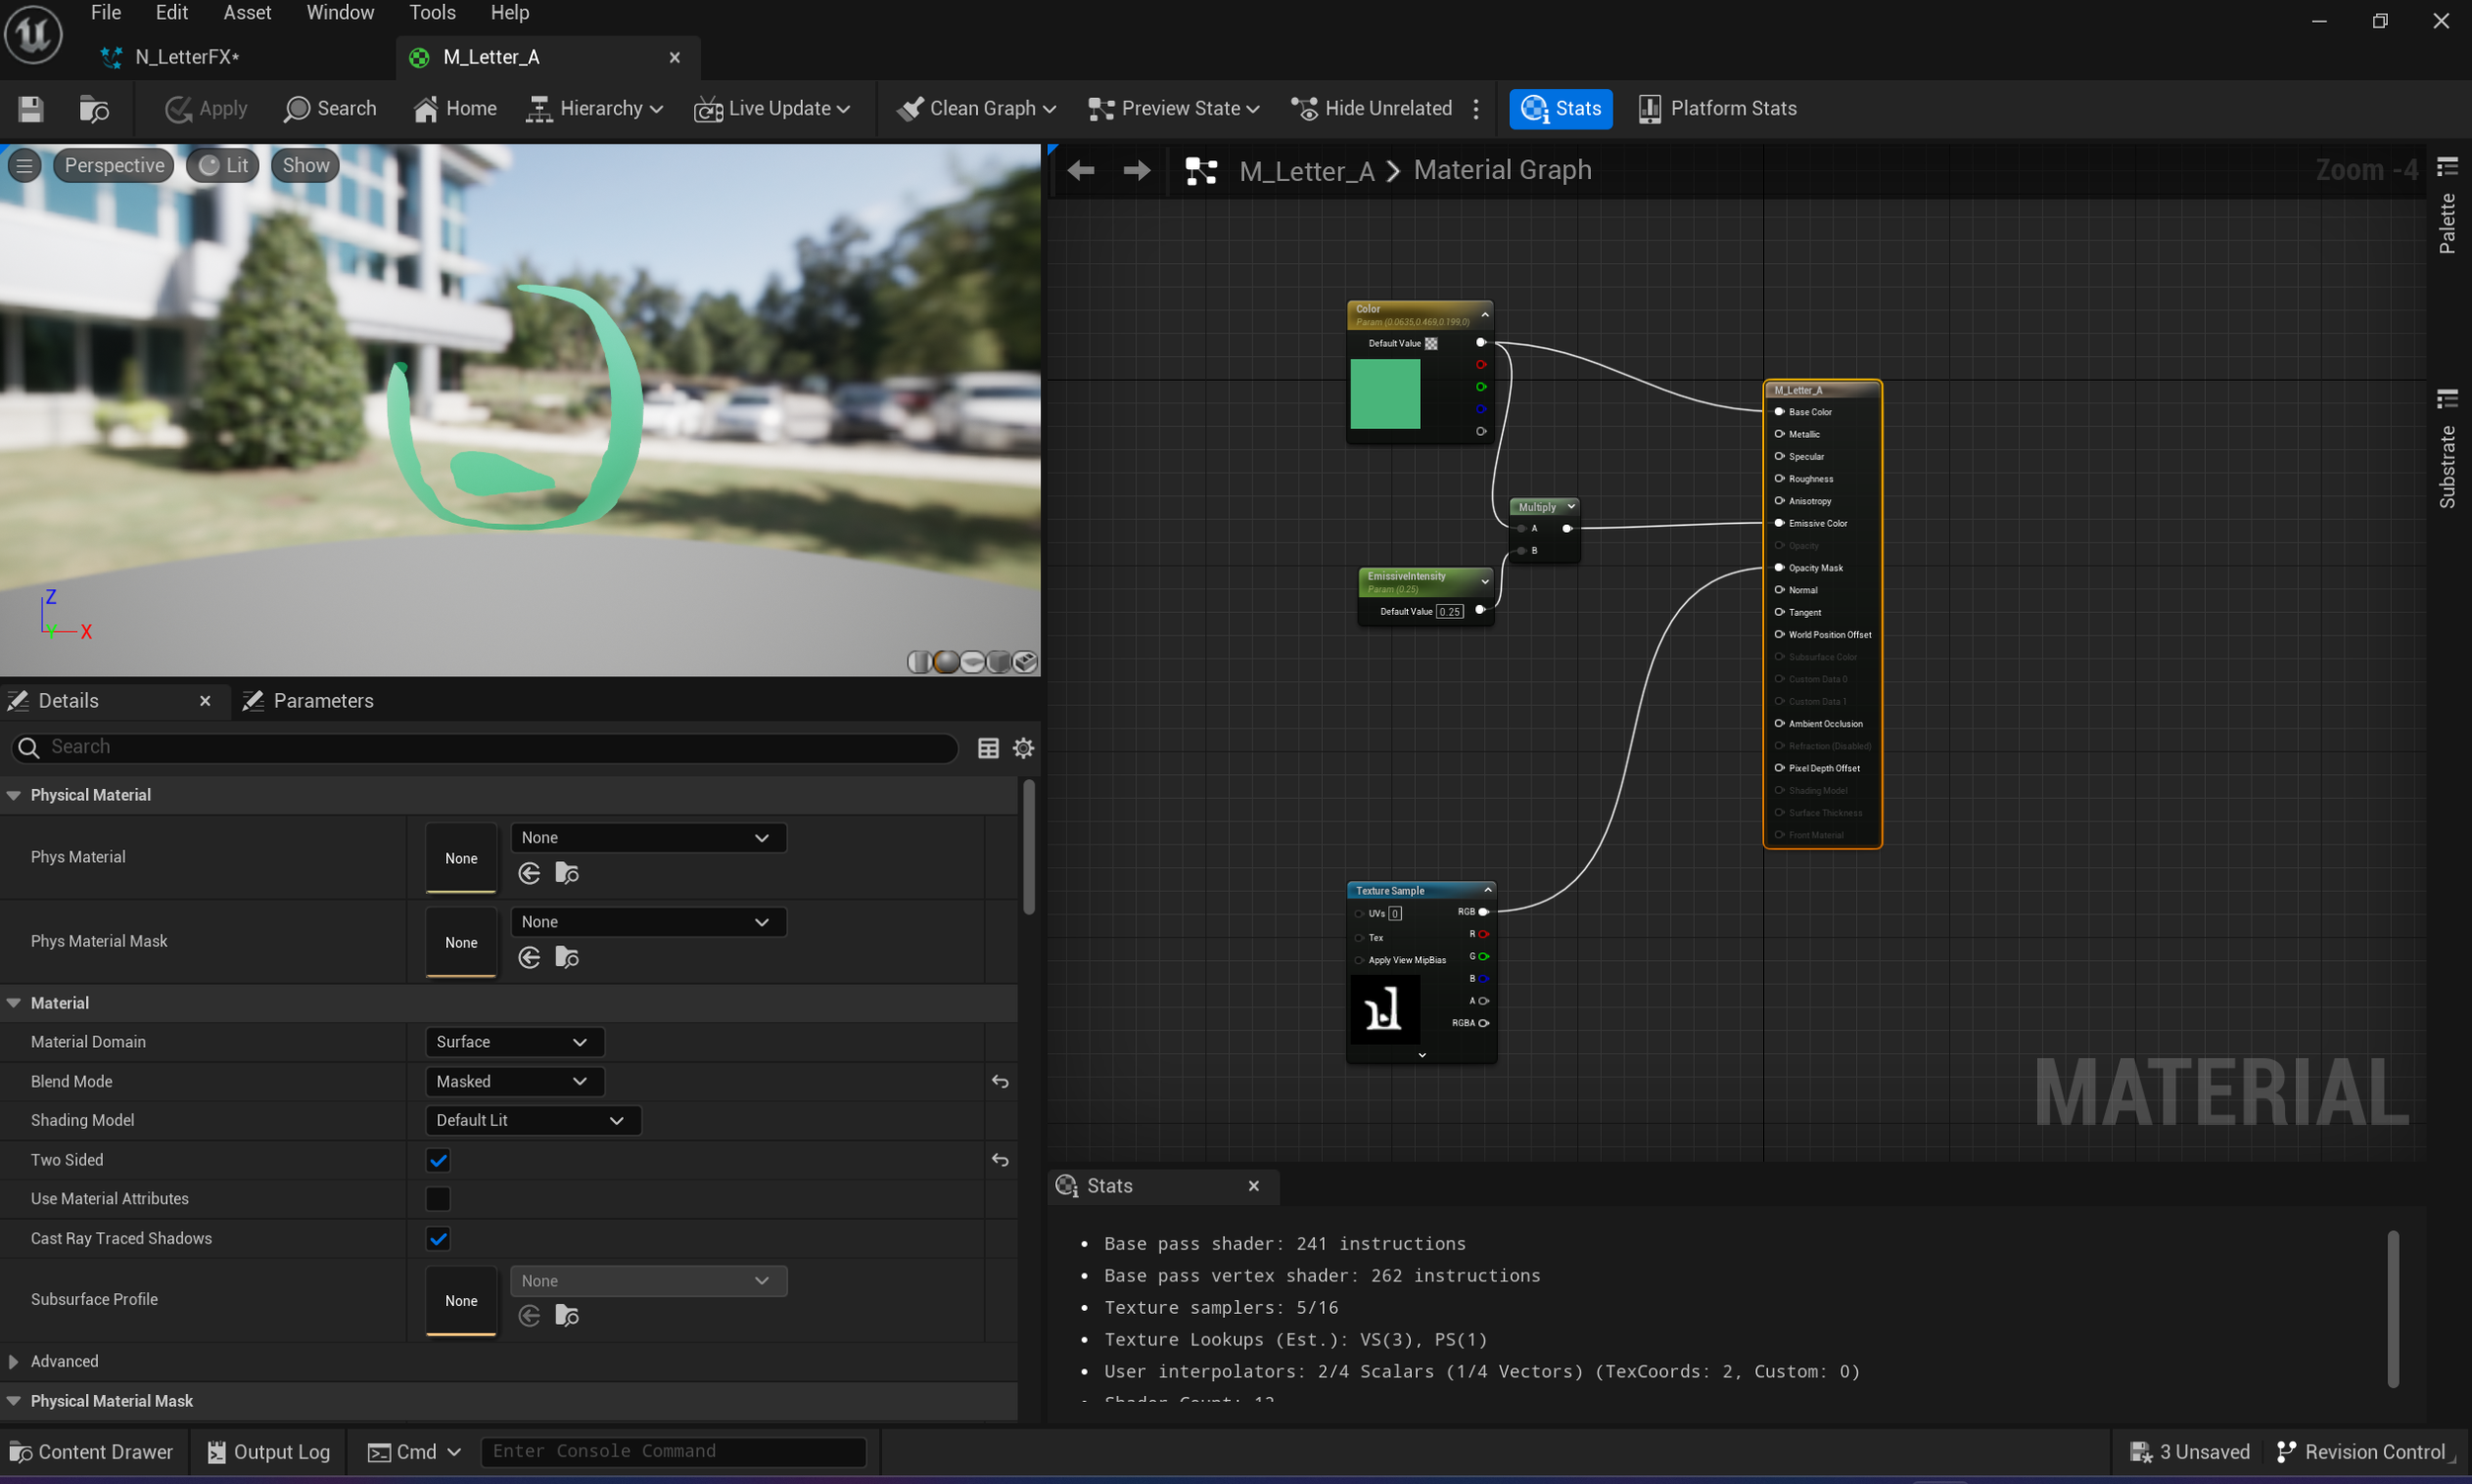
Materials can be simple to quite complex in Unreal Engine. I will say I did focus on keeping most of the materials simpler, but I did create materials for the VFX as well as the material in front of the doorway.
VFX materials were overall simple to put together! I went into Photoshop with some reference from Legend of Zelda series from Hylian fonts.
The material with the doorway was something that has a bit more complex nodes in the blueprint. For the doorway I decided to create a parent material for it then make a material instance out of that to be able to change and modify it the way I wanted. I started following a tutorial from Gorka Games demonstrating how to start off with a water material. As I have made other water materials before, I always find its helpful to refresh myself and see how others create certain things to learn and grow from it. I followed the tutorial from Gorka Games quite a bit then created a material instance from it and was able to modify and make adjustments to it non-destructively.
Lighting -
This is something I’ve always wanted to feel more confident in with majority of my personal projects. I wanted to keep it as minimal as possible while understanding more about using new lighting features in UE5.
I specifically used the Environment Light Mixer to help create the lighting.
I made sure to keep my lighting having the lights set to “moveable” since I didn’t want to have baked lighting. Here is a handy document from Epic about different lighting options as well as their mobility if you’d like to understand this a bit more clearly. As well as more information about features and properties of lights. I followed this wonderful tutorial from William Faucher going in depth about lighting in UE5. He has loads of great content revolving around unreal engine!
VFX -
VFX in UE5 was a bit different than what I was used to in UE4. I didn’t realize that in the updated version that there is only a Niagara set up rather than relying on the particle effect system and/or Niagara. Overall, it’s very much similar to UE4 particle set up, but I still decided to find some resources to create the VFX to ensure I was able to have the VFX controlled the way I wanted it. I’ll briefly go over the two separate effects I have made for the scene.
Lettering- I started off by creating each letter I wanted as an alpha in Photoshop. Exported each letter that was masked as a PNG then imported into the UE5 scene. From there I created a material and changed the settings to be used for a particle effect. This was a bit more taxing that I decided to create a material for each letter to use rather than to use material instances or combining them in the same material. It wasn’t the most optimal way of creating this effect, but I wasn’t aware of which letters I wanted to use.
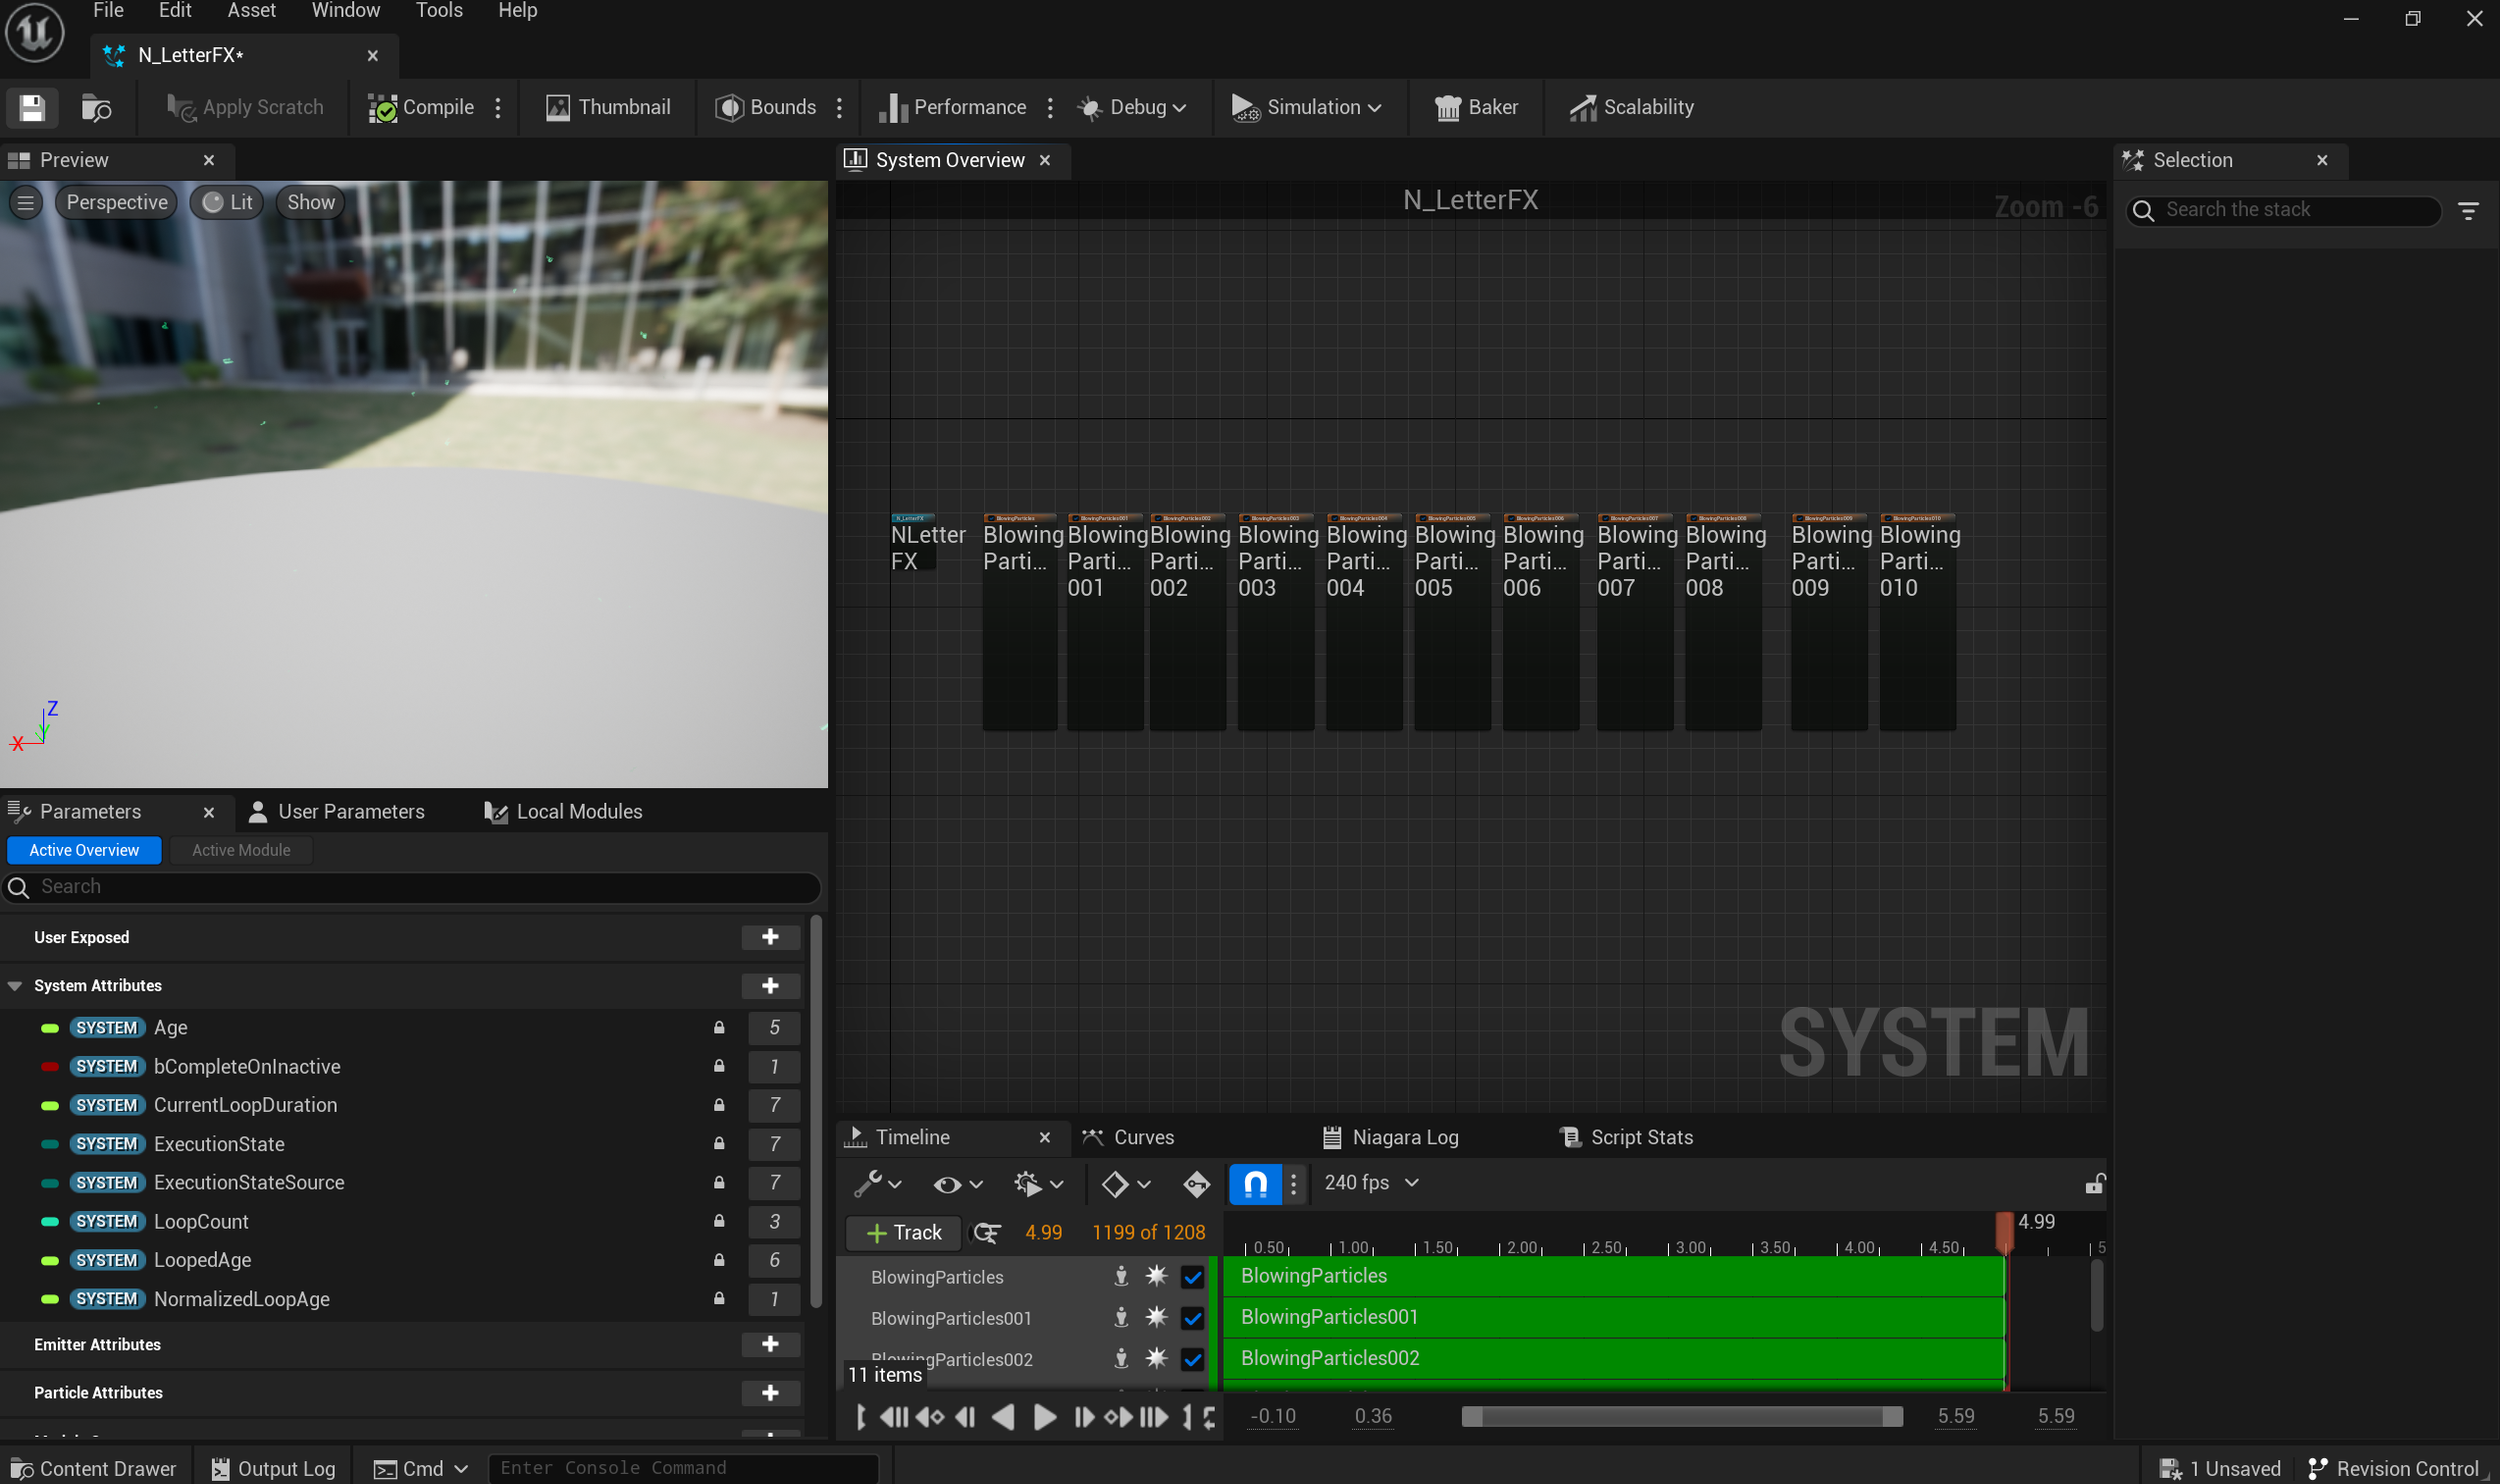
From the Niagara image above, below is the video demonstrating the nodes all working together in one effect.
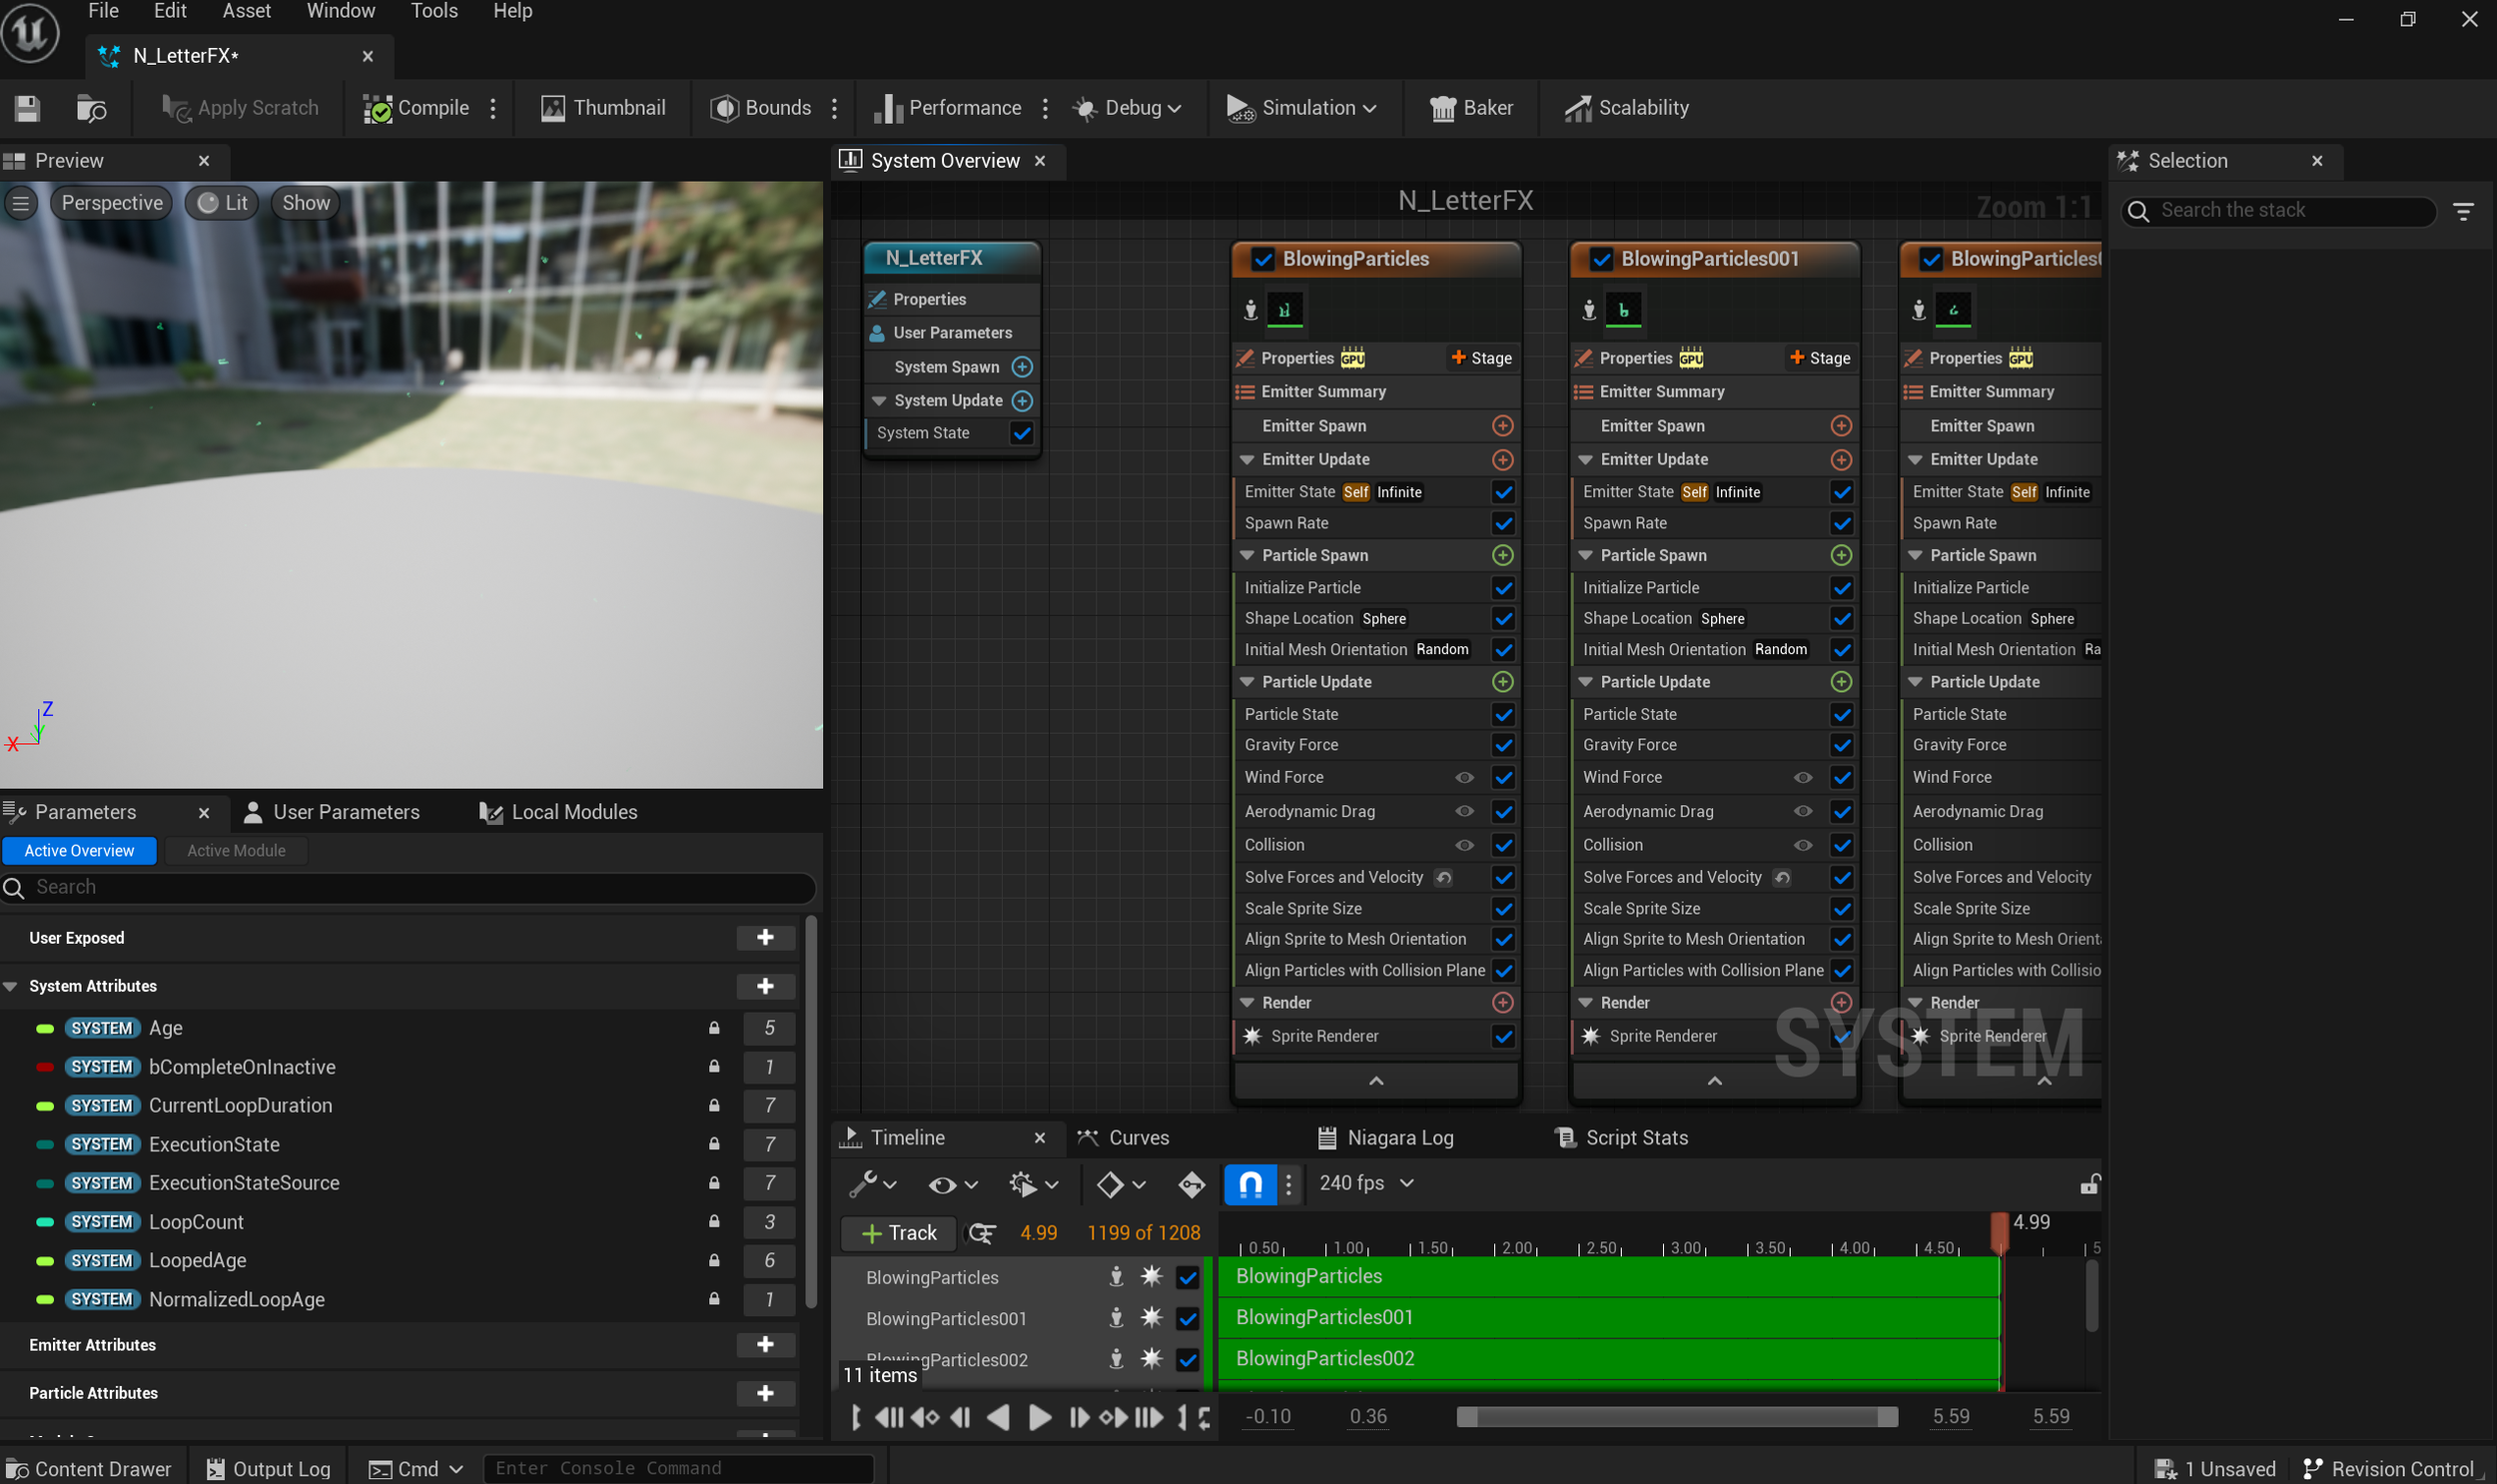
Aura/particles- This felt a bit more basic in the sense of I didn’t need to create as many textures. I was more open to the idea of not having a specific mask in mind since I wanted to see what I could do with just the Niagara windows. Rather than the lettering effect was more repetitive with multiple different textures.
I followed this tutorial to get the base of the particles in place. From there I made adjustments to each VFX node to get it more in line with what I was looking for. I had a “LowerCircle”, “InnerCircle”, “Aura”, and “Sparkles”.

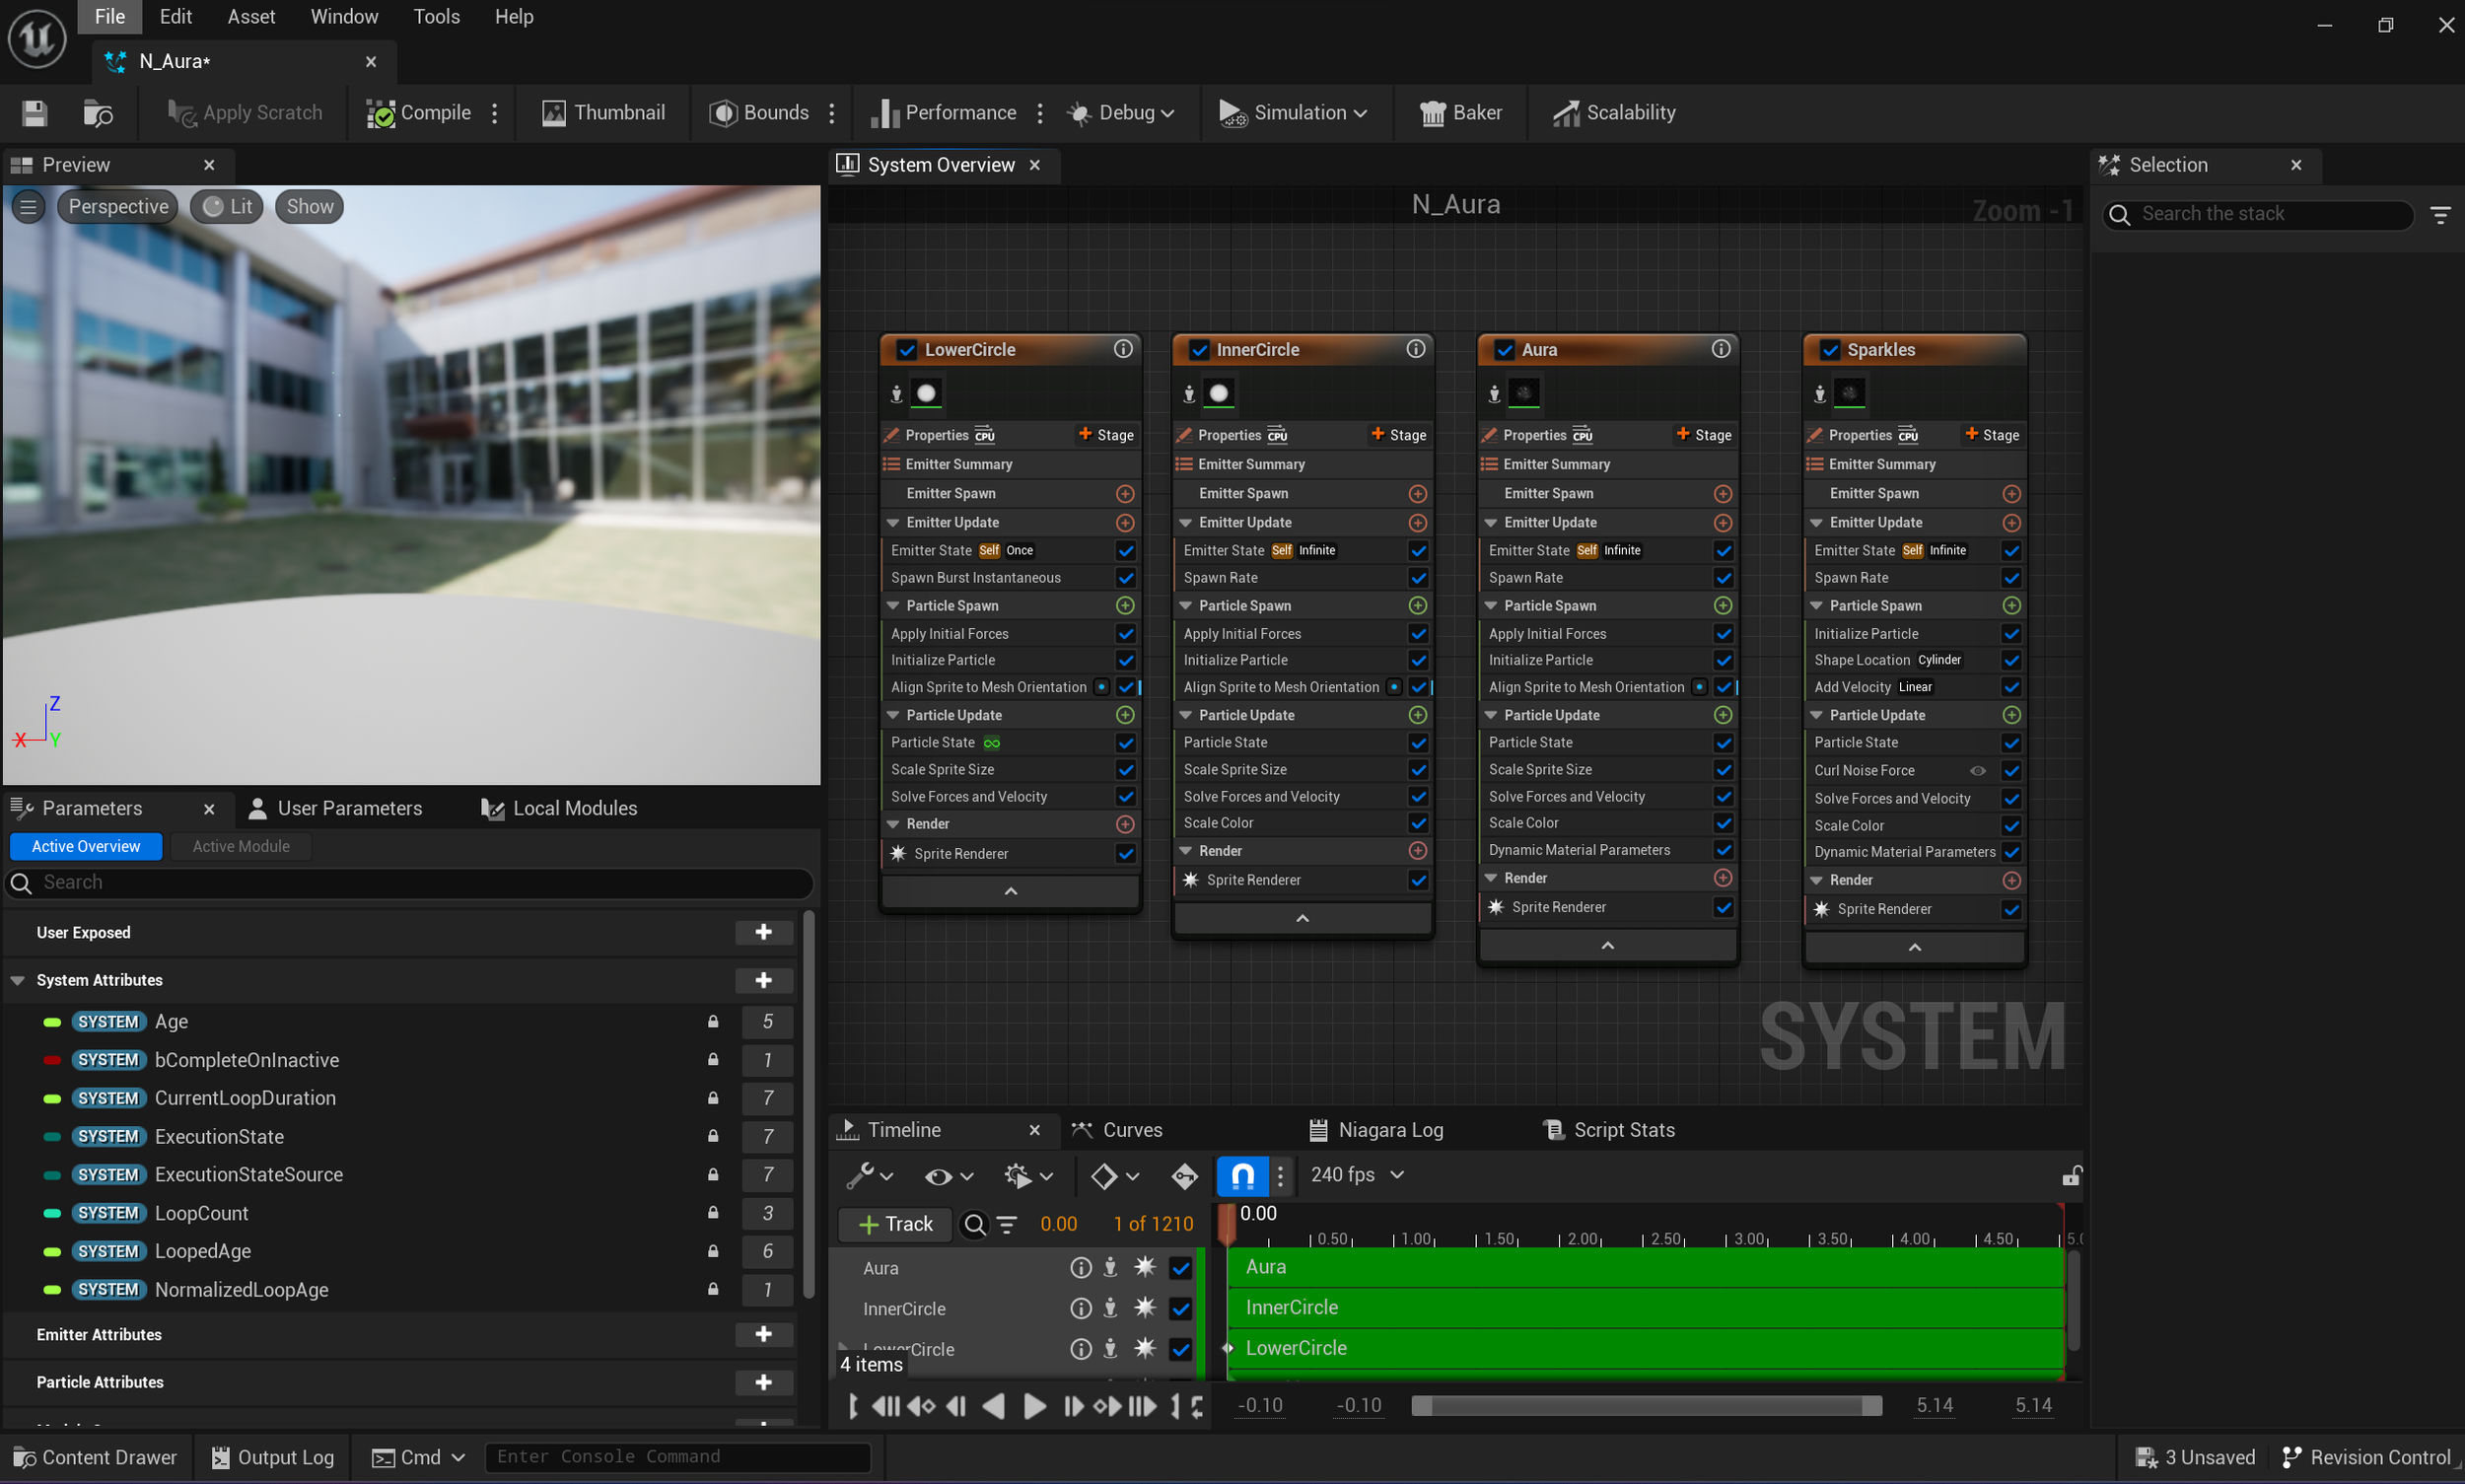
The “LowerCircle” has a low opacity (or alpha as referred to in the Niagara node, under the color tab) and a slightly different color than the “InnerCircle” node.
“InnerCircle” is very similar to the “LowerCircle” besides the color, size, and opacity being changed. I felt having them layered in this way would create a more interesting and mystical effect.
“Aura” is extremely subtle. It’s an effect that creates a slight veil of color and movement.
“Sparkles” are the circles that are floating up from the radius of the circle. I figured having a subtle different color floating up and around the center would help guide the viewer where I wanted them to.
Movie Render Queue -
For rendering I typically will enable the Movie Render Queue plugin, restart UE, and set a transform key for whatever camera I am rendering in the level sequence. There is quite wonderful documentation from Epic that dives deeper into different methods and ways you can utilize this plugin with. I typically will just create a new level sequence, attach the camera I desire for that render, set the transform on the camera, then go to the movie render queue and set up console variables. I typically will focus on these specific settings:
There’s great documentation here that I typically will reference and use for this process. Don’t forget after setting up any other settings in the queue, before hitting “render local”, I will “save as” that sequence and movie render queue so I don’t have to constantly reset up the settings I just put together.
It can be quite difficult to describe how I set up the movie render queue settings, but as you may have noticed by now, I of course have documentation from Epic games about what the movie render queue is, how it works, how you can use it specific to your project, and other amazing resources. As well as more information about how I set up my console variables (scroll down to step 7 of article).
I have discussed this process with previous articles on this subject, so I highly recommend going over and checking the rest out!
Final Thoughts
This project was fulfilling to create something that I had in my mind and execute it to a finished scene. It reminded me that there is “no one right way” of creating a 3D prop/environment. Whether it’s starting in Maya first or starting in Zbrush or whichever program you find most effective for you, there are many different ways to reach a similar or the same end goal.
With workflows and processes constantly changing in the field, it’s important to take a moment to familiarize themselves with it. I found myself learning new things in Zbrush, Substance Painter, and Unreal5. I was incredibly proud to dive deeper into VFX and Niaraga in UE5. I learned new ways of using specific nodes to help create and project the different VFXs to create the atmosphere and subtle animation to give the scene more movement and life.

It’s been sometime since I wrote a breakdown process of my projects, so I greatly appreciate everyone’s time to come here and look at my blog. It can be a bit overwhelming to get back into describing your own workflows and pipelines, but I’m beyond humble to have the opportunity to be able to share this information with anyone and everyone.
Please let me know what you think of this down below! Feel free to ask any questions as well. I will be sure to make sure to reply back to any and all comments. (❁´◡`❁)